I consider the snowy mountains my home. Although, not all slopes are created equal, and snowboarders tend to have their favorite and unfavorite spots, my love for snow makes me travel large distances to explore new horizons, different powders, terrains, and parks.
The peace and quiet of the winter make me stroll over the hefty mountains, and I think that offers much for a nature enthusiast like me.
I eat when I feel like it, roast something to keep me warm during the dense blizzard, and get ready for a ride when I feel energetic and ready for it.
While traveling, sometimes I forget to bring along the waxing iron for my next snowboarding adventure, but that doesn’t stop me. How? Because I always manage to get a pan, at least. Yes! The same pan you see in PUBG. Isn’t it a versatile item?
So for those who don’t own any specialized irons or heat guns and those who forget the iron at home like me, I have got an impeccable alternative. Read on to find the easiest possible solution for waxing your snowboard, and thank me later.
How to Wax a Snowboard without an Iron?
A specialized iron is a significant piece of equipment you use to drip the wax on the snowboard. It serves the purpose of melting wax and spreading the wax evenly on the base of your all-around snowboard. But just so you know, it may prove heavy on pocket for some snowboarders.
Without an iron, one cannot melt wax, so there won’t be any application. Some people tend to use the home iron for a wax job.
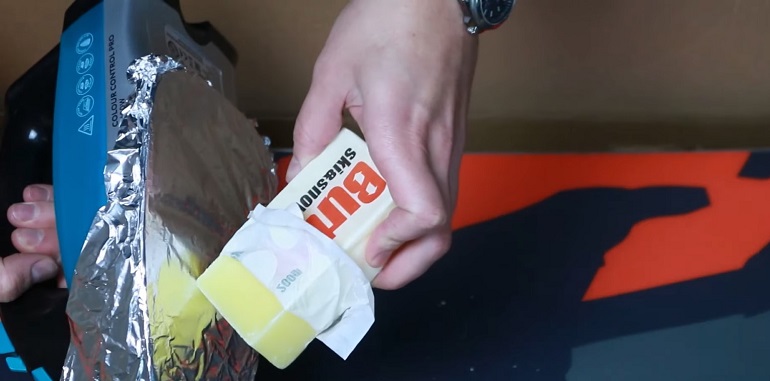
However, using it for waxing a snowboard will ruin it as you won’t be able to use it for ironing clothes anymore. So, to save the iron from getting useless, one can wrap aluminum foil around the base.
So, if you are running short on time, don’t hesitate to apply wax on the board by coloring on it, then utilize a heat gun to melt the wax. Furthermore, you use a paper towel, at the end, to wipe the wax on the board.
The crayon method isn’t that effective as the wax doesn’t penetrate the base of the board that effectively, but it’s still a quick wax job.
Comparatively, the pan method proves effective. It involves a pan and aluminum foil wrapped around the pan’s base. You use it like iron for the same purpose. But the good part is, it doesn’t get wasted like the household iron.
Things you need
Here’s a list of items you require to wax a snowboard at home.
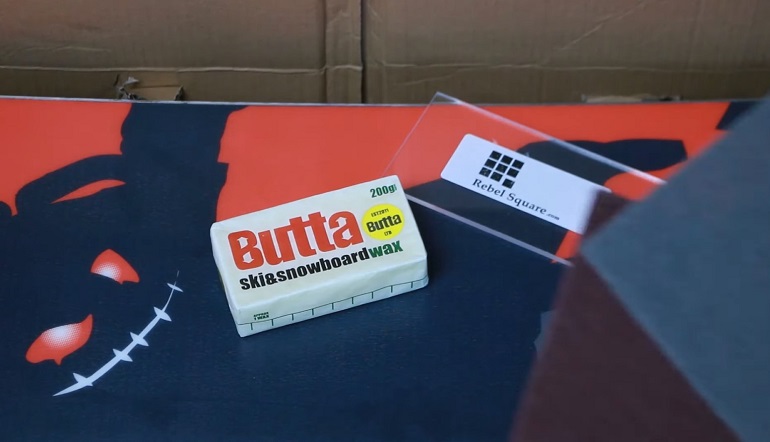
Wax
Use an all-temperature wax, as it works well in most situations
F-clamps
If you haven’t thought of any other way to hold secure the snowboard, then buy two F-clamps
Gummy stone
To remove any burr or rust from the edges
Steel brush
It is used to brush off the base before applying wax to it
Scraper
A scraper to remove excess wax off the board
Nylon brush
Used for structuring the snowboard
Pan
It will be used to melt and spread the wax on the board
Aluminum foil
For wrapping around the base of the pan
Now that you have collected the essential items, let’s get into the waxing process.
Steps
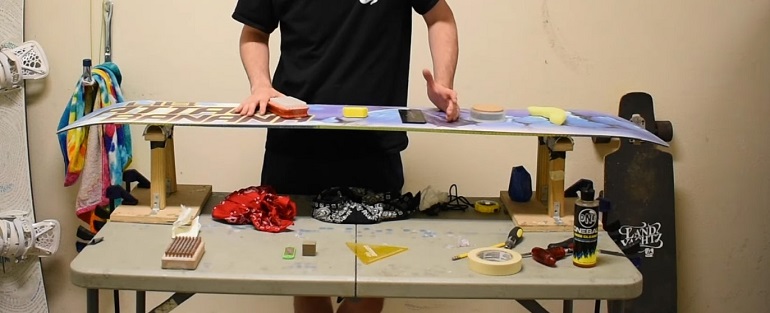
Now, the very first step is to prepare enough room or area where you want to work. It can be a kitchen counter, your garage, a table, or a workbench. Next, remove the lightweight snowboard bindings as leaving them on the board will ruin the screws and screw holes.
Make sure you clean enough room so that you won’t ruin any important item lying nearby while you wax. Once you are done with preps, it’s time to start waxing.
1. Secure Your Board
For waxing a snowboard, you need to securely hold the board in place before you start cleaning or waxing it. Otherwise, be prepared to wax everything around you.
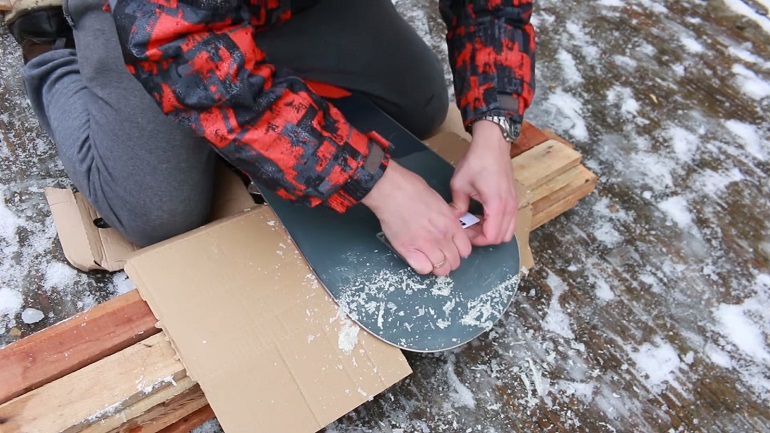
If you are clumsy like me and don’t trust yourself with the process, opt for any cardboard and lay it on the ground.
Then lay your snowboard on it with its bottom facing you. I know it doesn’t sound professional, but as for a factory wax job, they use some special kinds of tools.
But guess what? We are doing it at home. We will follow the protocols but with alternatives available at hand. Yeah, buddy! I know I’m becoming your favorite.
So, the first step should be holding the snowboard still in whatever way you like. The only requirement is that it should stay in place instead of slipping out of its position every now and then.
One can also use F-clamps or anything else to secure it into its place. I’m sure you are already thinking of various ways to hold it secure without spending a penny. Quite Impressive!
2. Clean Your Board
When you are done securing the board, give it a good cleaning session. Remember! You need to get rid of any old wax, dust, debris, or anything of that sort.
Okay! I got it! Now stop swanking your new snowboard. I know that new snowboards come with factory wax on them. But just so you know, this is typically light and has a thin layer of wax so it will prove good for some initial few rides.
So, instead of leaving the chat room, sit tight and learn because you will be regularly waxing your board in the near future.
Alright, buddies! Clean it well and look for any blemishes along the edges or within the base. It can be dirt, pollen, rust, corrosion, or anything of this nature. You can also use a base cleaner to wipe the dirt off the base. Then, a scraper to remove previously applied wax.
If you happen to find any burrs or cracks, grab your gummy stone and fix it right. If it needs some filling, fill it down. In the end, make sure you get a board in a tip-top shape. You should also need to checkout the wax and tuning kits for your snowboard.
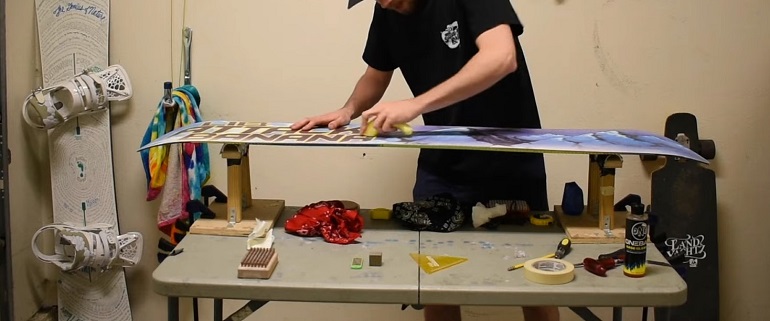
3. Brush Your Board
After you give your board some good cleaning, start brushing it using a steel brush. The purpose behind using a hard brush like it is that it helps in cleaning out the porous structure of the board. Also, it works more effectively than a chemical compound.
As your snowboard has got pores in it, the wax constantly builds up within the pores. Mind it, you need to get rid of it before applying a new layer.
Keep in mind the direction of your brush should not cross the grain of the snowboard. It means, always uses the brush in a parallel direction to your board and not perpendicular to the rails.
By applying an adequate amount of pressure, remove all of the remains of the previous wax.
4. Apply the Wax
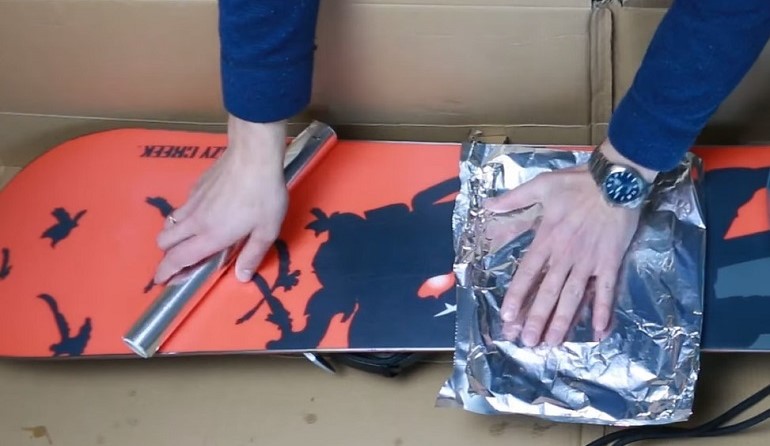
A snowboard wax melts approximately around 210-250°F, for which you need an iron. But now that you don’t own one, and you cannot use a household iron either, let’s use a pan to heat it.
Before heating your pan for melting the wax, first, wrap aluminum foil around its base. What’s the purpose behind it? The foil is used to protect both the pan and the board.
Now, heat your pan for 20 to 30 seconds on a stove. Take the heated pan and a cube of wax, hold the pan over the snowboard and apply the wax to the heated surface of the pan. To wax your snowboard evenly, start slowly dripping it all over the board.
Apply enough wax on it, if the pan cools off, reheat its temperature. After you are done waxing it enough, leave it as is. Let it cool down for one hour before you start scraping off the extra wax.
5. Scrape the Excess Wax
If you think you have put too much wax on the base, your second last step would be to remove extra wax from your snowboard. Now let’s talk about how you are going to use a scraper.
You need to hold the scraper away from your body as it will demand less energy. Also, make sure you hold it in a way that it is leaning in the direction you plan to scrape.
Remember that applying light pressure will let you save money. If you do it another way around and press it hard, be ready to buy a new board because this one will be good for nothing.
Also, apply pressure according to the grain, which means in a lengthwise direction. Why? Because a scraper carves microscopic grooves in the base of the board, which is impossible to avoid even if you keep your hand super light. So, the inevitable grooves should be working on your side and not against you. If they are created lengthwise, they will work in your favor.
Lastly, while scraping, the wax will start sticking to the scraper, which you need to get rid of from time to time and stay patient. Do not leave any patches of the previous wax layer, and do it cleanly.
Final Thoughts
Did you notice that waxing a snowboard without iron is an easy-peasy task? And you need to master it asap! Because it saves money for other good purposes.
On the market, you will find different products for a quick wax job. However, to make it work without using an iron, you need to use a pan or a heat gun.
In this article, I have explained the pan method in depth for you. I hope you execute it well enough and let your snowboard glide smoothly on your next journey! Best of Luck!
0 Comments