What Is the Best Binding Setup for Me
Your board type and your riding style says it all! One of the most important tasks you should have on your list is to find your style. Are you a park ripper? An all-mountaineer? Or a free-rider? If you cannot answer this query, I’d recommend you to use the reference stance markings on the top of your snowboard.
But if you are familiar with your style, let’s go and find the reason why the board has been acting up and getting rid of the poor rider, even when the dude’s been using the dear bindings. Wait, what does it mean? It means, you need not buy new bindings but a brain, okey-dokey!
Allow me to empower you with a superpower aka common sense. A wrong key will never open the right lock. Similarly, a wrong stance will never let you make it through the right terrain. I mean, setting a front stance on deep powder days will not only keep you from moving your board forward, but it will also make up for some wildlife in the snowy terrain – a jackass on the board. What a sight for nature lovers though!
If you hate the idea of it, you better listen up! So, let’s go and find which stance stands suitable for which riding style, and what other things you should consider for a perfect binding setup.
Stance and Riding Style
Park rider should set their bindings precisely centered on the board so that they can enjoy the ride in either direction. Moreover, the angle of their feet should be set the same amount to allow easy switching, known as a positive/positive stance. However, they can also nail jumps and stunts with a positive/negative ‘duck’ stance.
An all-mountain rider feels more comfortable with their bindings set back from the center, also with their front foot angled more heavily than the back foot, as mostly they are riding in their dominant direction. The ideal position for all mountaineers is positive/zero.
A freerider looking for the deepest snow experience should mount their bindings set back heavily to allow themselves more power and control, and a better chance to drive off their back foot. The binding angles also stand important. The suitable stance for freeride is the same as all-mountain, but one can also set their rear binding angled forward.

Board Type
Always choose your board based on your abilities, your style, and the conditions, as different boards are built for different purposes. But also remember that binding setup also partakes in this recreational activity.
Bindings can let you get the best of the board if you make some adjustments, so you better not ignore the small things – the kite flies because of its tail, though.
Okay, let’s get down to business.
Hey, all-mountain riders! Always opt for a board that can let you have the best of the whole mountain – a versatile board.
You may be riding a twin, a directional twin, or a directional board, but whatever it is, the board aims to allow you to explore a little bit of everything, and so should your binding setup. You guys can stand centered on the board in anticipation of changing conditions or may like to be setback a little, prepared to counter whatever may come your way.
Hey there, park riders! I know you will always go for a twin board with a desire to ride in either direction, indeed impressive! But don’t forget to use a suitable binding setup.
If you are an expert, only then you can handle the sudden switches. If you are a newbie and you don’t set your stance centered on the board, with both front and back foot angled the same, be prepared to eat pollution-flavored popsicle – mighty snow.
My advice to snowboarding for powder riding lovers is to pair their directional shape and flex boards with a setback stance because keeping the board afloat is critical. More nose than tail buddies!
Believe me, it is safe to heavily angle your front binding while leaving the back binding perpendicular to the board or slightly angled. This way, you can carve the snow all you want without missing a tooth.
Rider’s Ability
Your skill set determines what kind of binding setup you are in need of. For beginners, it is recommended to have their stance centered at first to help them find whether they are regular or goofy.
I’ll explain later the easiest way to find if your right foot is dominant or your left foot is. Once you have figured that out, you can set your stance setback slightly to allow your dominant foot more leverage.
If you are an intermediate snowboard rider, you must know whether you are goofy or regular, your next task is to find a comfy stance width and suitable angles of your bindings complementing the stance width, and make adjustments accordingly.
For advanced riders, it is recommended to try different board shapes and styles and explore different terrains and conditions. You may like your binding setup on your everyday board, but that might not be the case once you own a specialty board.
Adjustments I Can Make to My Bindings
Stance Width
The width of your stance determines your control of your board and your comfort level while riding it. It is important to know that there is no right or wrong distance for how narrow or wide your stance is. It is a matter of personal preference.
One can also get help from the reference stance points on the sheet of the snowboard, but the ideal way is to stand on the snowboard with your knees aligning just outside of your shoulder width – a power stance. Remember! the wider the stance, the more stability you will get. The power stance will allow you superior balance when you are lunging, jumping, or leaping.
When you are done figuring that out, place your bindings on the board, and mount it, just don’t tighten the screws much.
If you are still confused about a comfortable stance width, take reference from the table given below, it will prove a good starting point.
Learn more about what size bindings you need to adjust your bindings perfectly.

Angles
Your chosen angle will write your fate, whether you’ll stay longer on the snowy terrains or you’ll resort to packing things up early and going home. If you end up setting an unsuitable angle, you are most likely to hurt your knees and calves.
One can easily adjust their angle with the mounting disc in the center of their binding. On your binding baseplate where the disc fits into the binding, you will notice some dash marks (angles) with a figure every fifth mark.
You must acknowledge that different snowboarding styles require different stance setups. For instance, some freestyle riders swear by a duck and a narrower stance with their front binding at a positive angle and rear binding angled negatively. This allows more room for tricks and rotations. While some free-riders and all mountaineers prefer to have same binding angle for both bindings.
Refer to the table given below about our recommended angles which will guide you on suitable angles for your preferred style.

Position
How do you like your stance? A setback stance or a centered stance? Well, it’s not for you to answer this question but your snowboarding style and the board. Position refers to your binding’s placement on the snowboard, and I have some recommendations for you.
Freestyle riders have a goal of performing acrobatics, tricks, and stunts, which can be accommodated by a centered stance, which means, leaving an equal distance towards nose and tail.
Free riders are hungry for speeds, carvings, and attacking steeps. Thus, a slight setback stance (slightly moved towards the tail) will do the work, as it will allow you to follow the line of the nose and float through powder more swiftly. While all mountain riders can follow the same course as free riders.
If you need to know how to mount your bindings check out our guide.
How Can I Know if I Am Goofy or Regular
Here comes my favorite question as it involves kicking some ass, I mean football. It is all about knowing how your feet function. You need to find out which foot you lead with while riding or while kicking a soccer ball because that’s the dominant one.
I recommend you use your dominant foot in the rear, especially if you are a newbie. It will empower you and allow you to have better control over the board. So, what actually is a regular or goofy style? Regular riders tend to have their left foot near the nose/front and their right foot at the rear of the board, while goofy riders do the opposite and lead with their right foot.

Steps To Adjust Snowboard Bindings
The first step after knowing your terrain type is buying a board and compatible bindings and boots, then is to select your forward foot. As I have discussed earlier, knowing if you are regular footed or goofy footed will solve the equation for you. The key principle is to keep your dominant foot in the rear while the other foot forward.
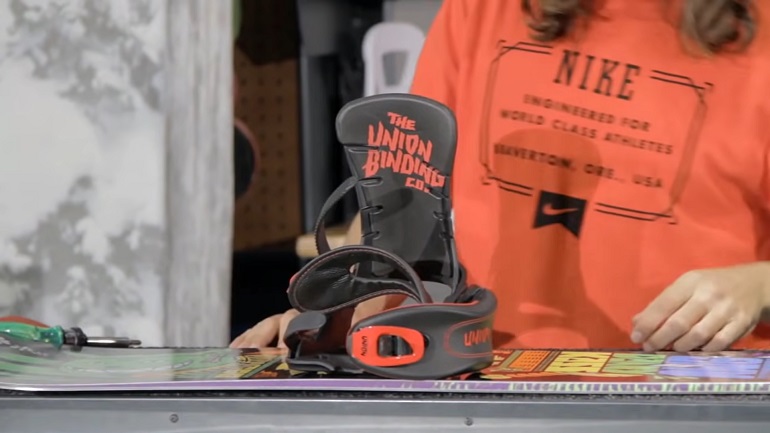
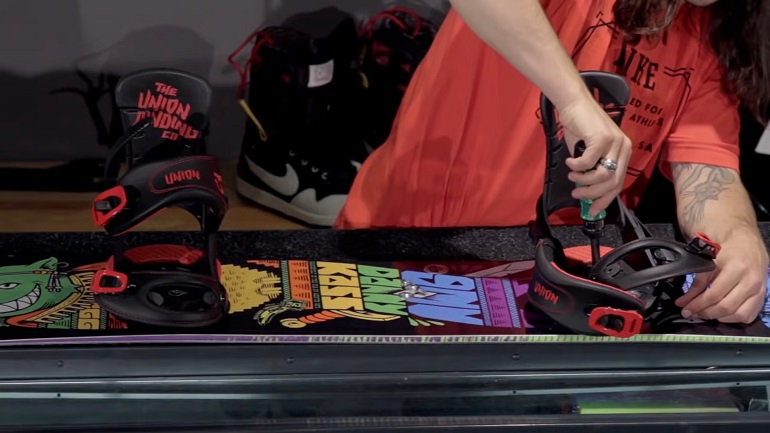
Once you have figured out suitable stance direction, position, and angles, you are ready to mount your bindings to your snowboard. Most boards come with 2×4 or 4×4 mounting patterns. If yours possesses one of the mentioned patterns, you will have two baseplate discs with degrees (angles) marked around the edge for angle selection. You need to follow the following steps to mount the bindings to your snowboard.
- Unscrew the foot bed of each binding and insert your baseplates.
- Set your baseplates to the desired stance angles, making sure your front binding has a positive angle while the back binding posses a negative angle.
- Now line up the holes of the baseplate with the reference points on your board.
- Confirm if the positioned bindings and the stance feels comfortable to you or if you need to make your stance narrower or wider. This way, you are setting your stance width.
- Position your binding in a centered stance or a setback stance, however your desire.
- When you are finished with adjustments, insert the screws and washers into all four holes on each binding and tighten down until it is secured.
- Put on your boots and tighten the toe strap and ankle strap.
- Double-check your stance, adjust your good snowboard bindings if you need to and you are ready to go!

Now that you are done with mounting it, it is time to adjust the bindings themselves. Adjusting the angle of the high back or forward lean will immensely impact your body posture and the way the board performs.
Angling the high back forward will make your knees bend, giving you an aggressive stance and a lower center of gravity. It is better for edge control. You can also push back the high back as far as possible, in the end, it is a matter of personal choice.
Conclusion
Hopefully, I have answered all your queries regarding adjusting snowboard bindings. I’d like to repeat that you are a key player here, as your binding adjustment depends largely on your style, comfort, and ability.
Mind it, a proper stance can make you level up your game, but if you fail to achieve it, you will end up taking pills for knee pains and whatnot. So, better act on the million dollars tips I have given and thank me later.
0 Comments