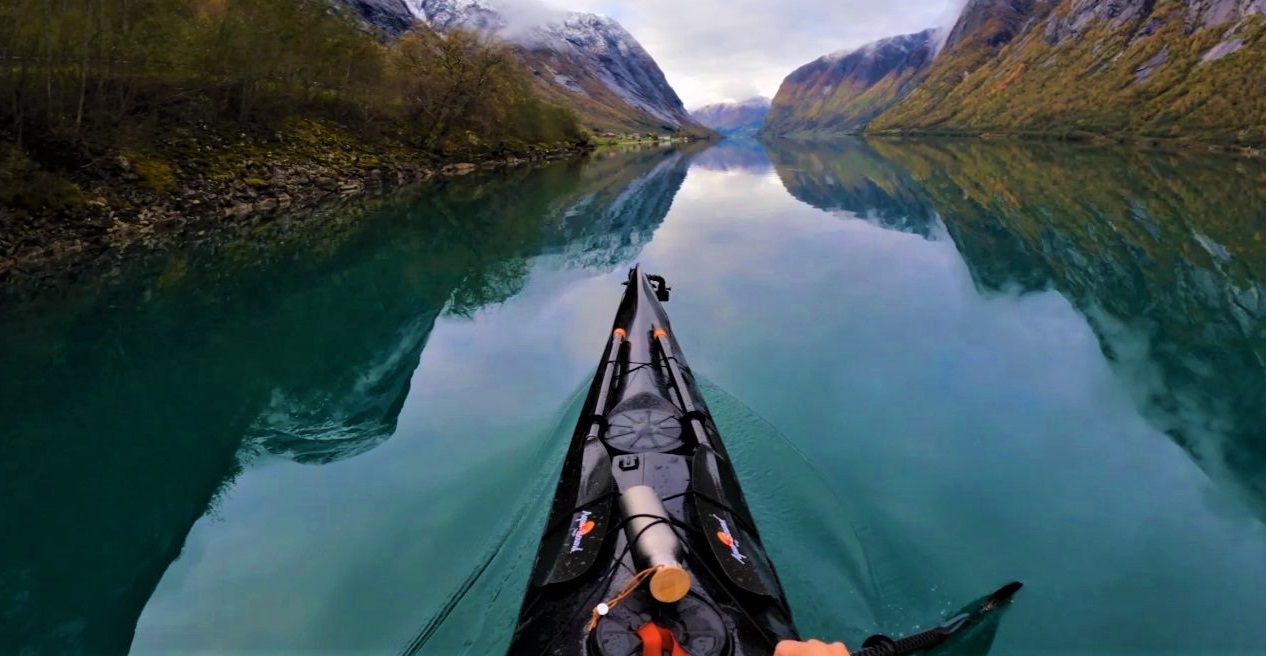
If you’re looking for an activity that not only gives you a full body workout but is also wildly fun or beautifully serene, then kayaking may be the one for you.
It is a versatile sport that can range from gentle paddling across a calm body of water, to whitewater kayaking through ravines and rivers. Whatever your preference, a kayaking jaunt can provide.
As a beginner kayaker, it is usually best to get as much information as you can on how to kayak. Find some calm waters or even a local swimming pool and practice the basics. Picking up the first strokes and mastering balance can be achieved quite quickly on your first kayaking trip, but fine-tuning your skills and start taking on some more challenging locations takes a little time.
It is important that you have all the correct gear and the appropriate kayak for whatever kind of day out you have planned. There is a multitude of different types of kayaks, paddles, and safety gear out there.
It’s important to know you have what you need, not only to stay safe but to have the best time on your first kayaking excursion.
I have compiled a few beginner kayaking tips and tricks for you to browse. There should be just about everything you need to know to get started out there on the open water. I have included some in-depth instructions, a good breakdown of safety precautions, and a great list of essential kayaking gear.
What Kayaking Gear Do You Need?
Before you get out there, it’s best to know what you’ll need to have the best day out. Take a look at this list of kayaking essentials.
Kayak
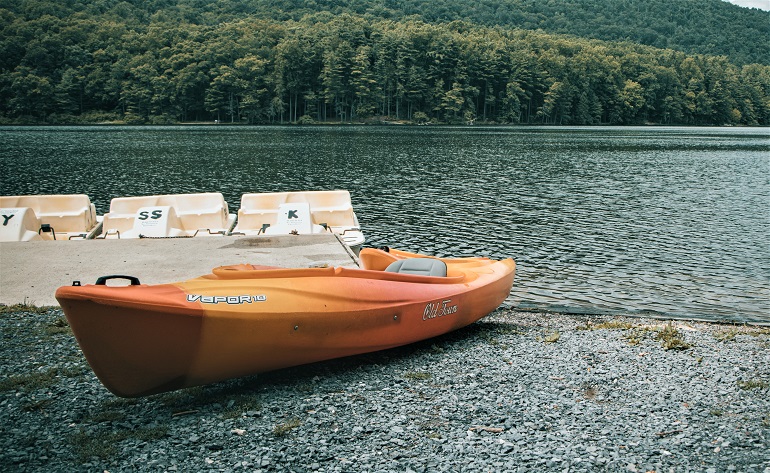
This one is a bit of a no-brainer. You’re not going to get very far without your own kayak. It is advised for beginners to get a kayak that feels roomy, is easy to get in and out of, and can easily be righted if it flips.
Comfortable recreational kayaks are a perfect place to start. They come as sit-on and sit-in kayaks and have a nice wide shape and an open top. They are harder to tip due to their size and are really easy to climb in and out of. They’re not made for speed, surf, or high-adrenaline whitewater kayaking, but they will suffice for learning.
When learning, you will want a kayak that allows you to work on your basic kayaking skills before you really try tackling something a bit more advanced.
The recreational kayak is a well-adjusted kayak that will give a calm and easy kayaking experience. Just about anyone should be able to jump in one of these and be paddling along in no time.
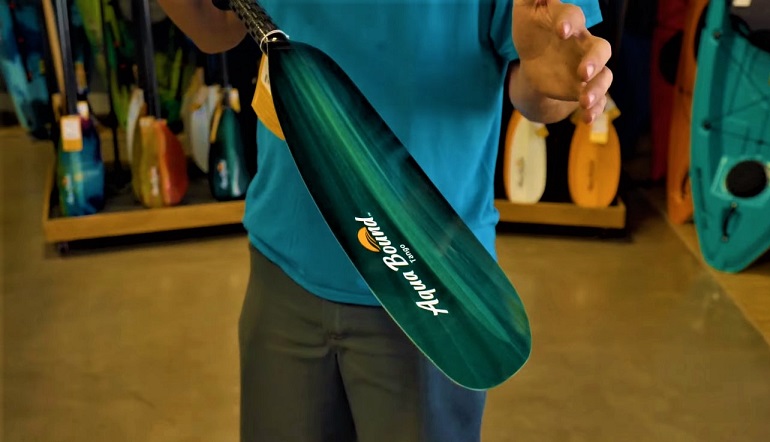
Paddle
Do you know the phrase ‘Up the creek without a paddle’? Well, give kayaking a go without one and see where the term comes from. You need a paddle to paddle a kayak, thankfully they will usually come with one.
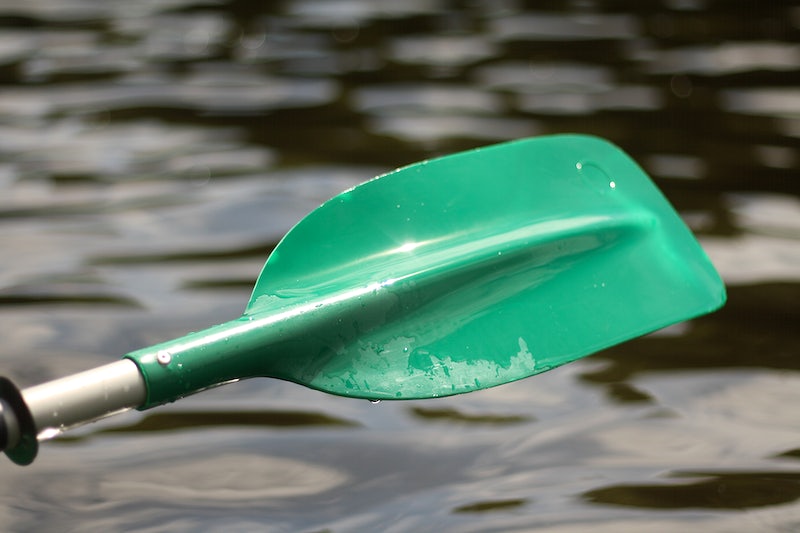
Make sure you get a paddle with forgiving grips, a lightweight paddle shaft, and a solid blade. Most paddles are buoyant, at least for a time, but this is something you should double-check regardless. If you take a wet exit, you don’t want to be left with your only method of paddling to be at the bottom of your local lake.
Your paddle is responsible for more than just forward stroke momentum, they are also able to maintain a stable kayak and turn your boat. Learning proper paddling techniques will take time, but with some patience and plenty of practice, you’ll be skating around the water like a swan.
Life Jacket
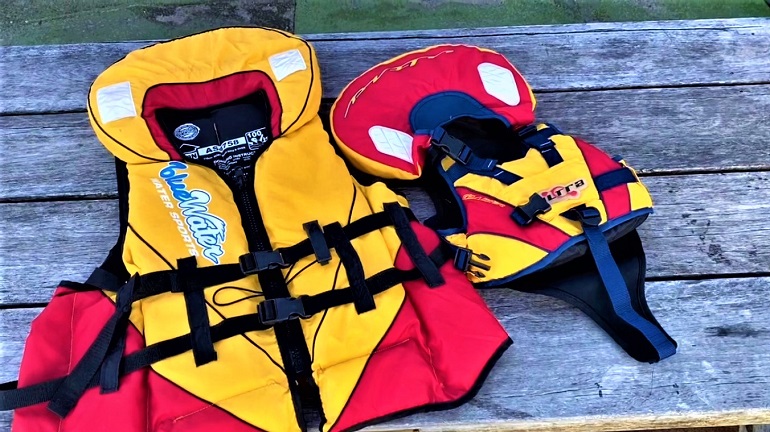
Perhaps not quite as essential a bit of kayak gear as a lightest kayak paddle and kayak, but still very important for your safety and enjoyment. Even the pros take a tumble sometimes, it’s easier than you think to capsize a kayak.
All of a sudden being beneath the water is a shock. Having your own personal floatation device will insure you bob back to the surface with nothing more than a bruised ego.
A good quality kayak life vest these days will be hardly noticeable when worn. If you have the proper clothing, such as a rash guard, your floatation jacket won’t rub and can even keep you warmer. Whether you’re in shallow water or the open ocean, if it’s your first time kayaking or your hundredth, always wear a kayaking life jacket.
Bilge Pump

The kayak bilge pump keeps the bottom of your kayak nice and dry. They are designed to take the shallow water out of the bottom of your boat and put it back where it belongs. Beginner kayakers are more likely to fill their sit-in kayaks with a bit of water, so it may be worth a thought. A sit-on-top kayak has less of an issue with this.
I wouldn’t count them as essential gear, but more and more kayakers are taking them out with them these days. In the unlikely event even of a capsize, it is almost impossible to get all the water out of your kayak. It can get unpleasant having your butt firmly in a puddle of water for a long time.
Types of Kayak
As mentioned previously, the best bet for beginner kayaking would be the recreational type. As you improve and start looking to do some more advanced kayaking, you may want to branch out and give something else a go.
Whatever kind of outdoor exploration you fancy, there’s a kayak to suit. Along with some beginner kayaking tips, we can break down the different types of kayaks for you to consider.
Recreational Kayaks
A great choice to go kayaking on your first trip. They’re accessible and a perfect way to start your new hobby. They are wide, feature a wide open cockpit, and offer more stability than a lot of the other kayaks.
They have enough room for a kayak dry bag and often come with a second seat for a friend or instructor. They are designed to paddle through calm water at relaxed speeds and get to grips with proper paddle skills.
They lack the streamlining or a lot of the waterproofing that other models may feature, and they’re not the easiest to transport, but for beginning kayakers, they’re ideal.
Tandem Kayaks
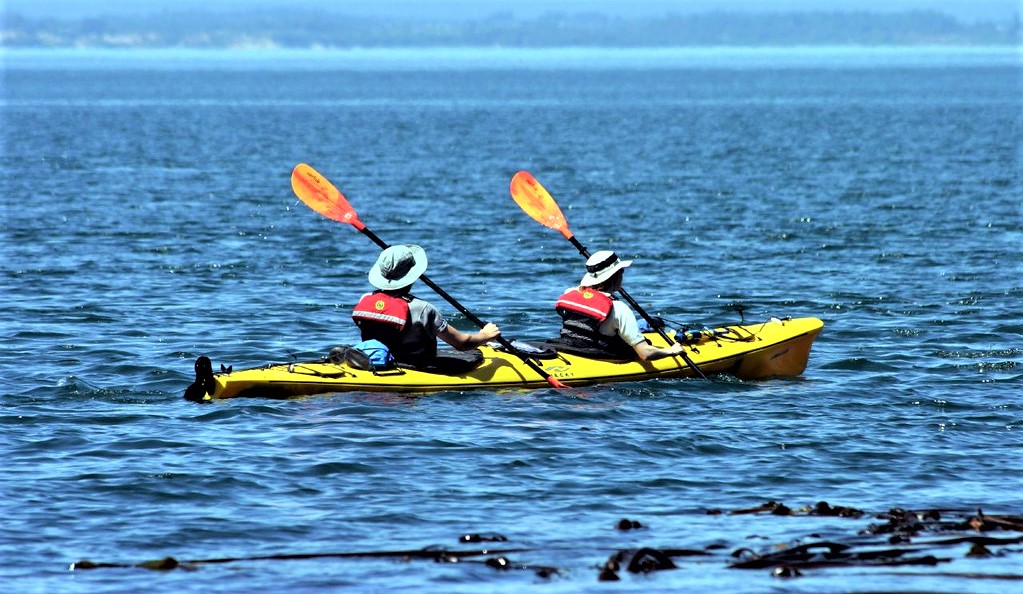
These are ideal for heading out with a friend or family member. They sit high on the water and have plenty of room for two. These sit-in kayaks are made for excursions on calm and gentle waters such as a lake or the sea. You can check out the Intex Explorer K2 review for a good beginner-friendly tandem kayak option.
Kayaking is always better when shared with a pall. For first-time paddlers, it is a great way to get some guidance from a more experienced paddler. You could even take along a guide for a guided tour of your local water.
Inflatable Kayaks
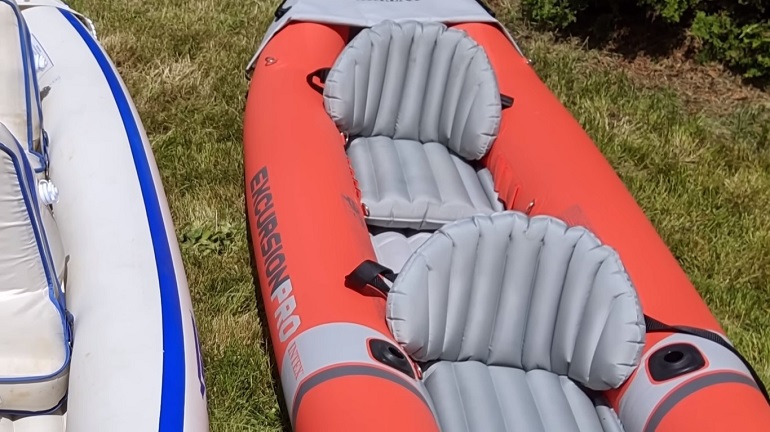
The blow up kayak is far and away the most accessible and commonly seen kayak. If you want to go out on a kayaking trip but don’t have either the roof rack or space to store a kayak, then these are perfect. Different types of kayaks can be inflatable to suit most needs.
Inflatable kayaks can be quickly inflated when needed and then deflated and packed down into surprisingly small and versatile bags when no longer in use. They make owning and storing a breeze.
Inflatable kayaks are much more sturdy than you would expect. They are built with durability in mind. If you invest in a good one, it will last you just as long as a traditional solid-hull kayak.
Fishing Kayaks
Kayaking is a perfect way to get out into the water to get your hands on fish you could never find on dry land. They often have a put-in point or two for rods, plenty of space for coolers and nets, and tons of amazing features suited just to fishing. This is the right gear to have if you consider yourself a fishing enthusiast.
If you feel you lack the upper body strength to constantly paddle the kayak, you can look into pedal-drive kayaks that would make the experience more comfortable and easier.
Whitewater Kayaks
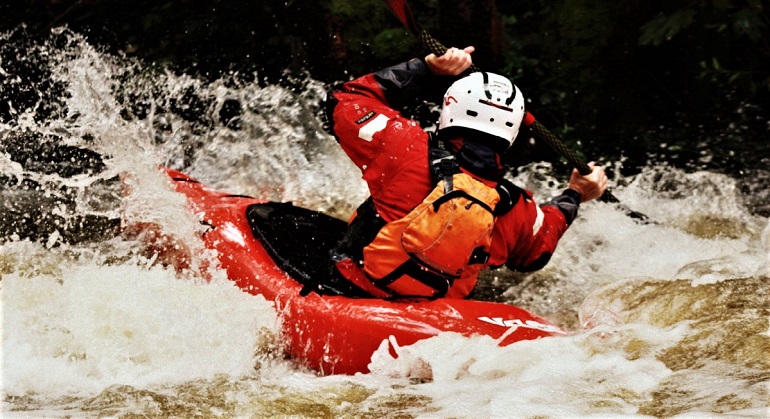
As the name suggests, these are kayaks designed for paddling through the whitewater of high-speed rivers. They come in a number of different styles and always sit inside kayaks with an enclosed seat. This holds you secure inside the body of the kayak, even when things get choppy.
White water kayaking is a wild ride reserved for the brave. It is fast-paced and takes a lot of skill. The kayaks are usually very small and built to be repeatedly submerged and rolled without taking on water.
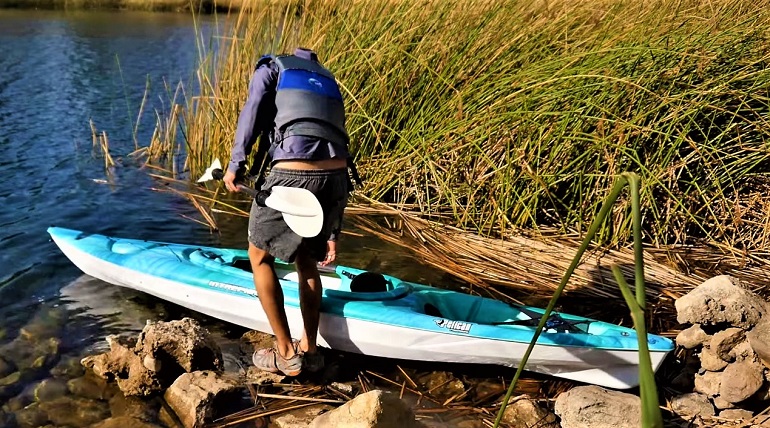
Touring Kayaks or Sea Kayaks
The touring kayak is built for longer trips and makes the physical activity of kayak paddling as easy as possible. Their sleek design is built to hold a few bits of luggage whilst also being able to slice through the water.
They are a lot longer and thinner than a recreational style and often come in at over 12 feet. They would be a great idea for a kayaker that has done a few trips already and fancies something a little more advanced.
How to Adjust Your Kayak
Kayaks are light and much smaller than a lot of other personal water vessels. You should be able to really work alongside the small frame of the kayak. Adjusting the positioning and the sizing of your kayak will ensure that even on big days out, you won’t be left slipping around and aching.
It’s good to take the time to fit it all. Check these beginner kayak tips to make sure you’re riding in comfort.
Sizing
When you climb into your kayak, you will want the cockpit to be snug but not in a way that will rub as you twist or trap you if you need to make a speedy exit. Getting stuck inside a capsized sit-inside kayak is a scary prospect.
When you climb into your kayak, you want to make sure that your legs can stretch out, but you are also able to push your thighs against the sides of the craft. With sit-inside kayaks, it offers a little more control and power to your paddle strokes.
Seat Adjustments
Making sure your backrest is exactly where it needs to be is a very important factor in the small adjustments you can make when getting into your kayak. With both sit-on-top kayaks and sit-inside kayaks, the correct sitting position will make a huge difference to your lower back support and paddle strength.
Plant your butt firmly in the kayak seat and adjust the seat. You want to be at a 90-degree angle with a slight bend in your hips to push your chest forwards. You want to ensure your torso isn’t bent forward or backward, as this will cause a lot of discomfort over a long day.
Foot Peg Adjustments
When you climb into your sit-in or sit-on-top kayaks, you will feel two-foot pegs lower down the inside of the kayak. Adjust them so that you can use them to paddle without slipping about. You want to have your knees slightly bent without discomfort.
How to Launch Your Kayak
For first-time paddlers, this may actually seem rather tricky. Once the kayak is actually off the shore and in the water, it all of a sudden seems like a completely unstable and unmanageable vessel.
If you have been spending time in an introductory class, you will already have this under wraps, but for those of you just setting out, here are some kayaking tips for getting off the shore.
Shore
- Transport your kayak to your put-in point on the shore, making sure to be in shallow enough water that you can straddle the kayak. Have the bow facing out, and ensure the whole kayak is floating.
- Tuck your kayak paddle shaft through one of the lines across the front of your kayak within hands reach.
- Place your hands on either side of the kayak and walk from the shore and along the body of the kayak with your feet on either side until you’re straddling the cockpit.
- Pop yourself down onto the seat, lifting your feet from the water and tucking them down into the body of the boat.
- Push yourself back into your seat and put your feet on the pegs. Grab your kayak paddle and make sure to be aware of waves and wake from powerboat traffic.
Dock
- Place the kayak into the water running parallel to the dock.
- Swing your legs down into the kayak, making sure the kayak paddle is on the same side as you.
- Using your arms, lower yourself into the cockpit of the kayak, sliding your legs down the body and pushing yourself into the seat. Don’t forget to grab your paddle before you float away from the dock.
How to Identify and Choose Your Kayak Paddle Blade
Too short of a paddle, and you’ll be endlessly bumping the paddle blades off the side of the kayak. Too long of a paddle length, and you will have an unwieldy paddle that slaps off the water and wastes energy. Getting the correct paddle blades will make sure you’re kayaking like a pro.
Length
There is no hard and fast rule to the size of your paddle. Of course, you want it to hit the water, with the paddle blade about 3/4 submerged, but you don’t want it to be bouncing off the hull the whole time.
Depending on the kayak you are in dictates the length. An inflatable or sit-on-top kayak will need a longer reach than someone in a sit-in design.
Construction
For first-time paddlers, a simple and cheap option for your paddle is either plastic or aluminum. These are reliable and incredibly lightweight materials, but they do lack in durability, and you may end up going through a few of them.
That’s to be expected, one of my beginner kayaking tips is to buy expendable gear cheap until you learn not to destroy them.
Once you got your paddling down, invest in a carbon fiber build. They are expensive but are featherweight and incredibly hard-wearing.
Blade Size
Bigger blades are great for huge water displacement. Your forward stroke will take a lot more effort but will power you along at a great clip. If you think you have the strength to push with a large blade, then go for it. I would recommend trying something a little smaller until you are already familiar with the exertion.
The Basic Kayaking Strokes
Get the basics under your belt, and the rest will follow.
The Forward Stroke
This is as rudimental as paddling gets. Start the kayak moving forward with some solid forward strokes.
- The Catch Phase – Twist your upper body and push the blade into the water at about level with your feet.
- The Power Phase – Using your whole body, pull the paddle through the water alongside the deck line. Pull with your lower hand, push with your upper hand, engage your core, and twist with your body.
- The Release Phase – Simply pull the blade out of the water, you should already be wound for the next stroke.
The Reverse Stroke
Just as important as starting is stopping. The reverse stroke is what will bring you to a stop and even pull you backward.
- The Drop Phase – Perform the exact opposite of the forward stroke. Twist your torso and dip your paddle behind you alongside the kayak.
- The Power Phase – Pull with your torso and lower hand whilst pushing with your upper hand, all the way to your feet.
- The Release Phase – Pull the paddle blade from the water and prepare for the next stroke.
The Sweep Stroke
The most effective way of turning is by using sweep strokes. Rapid rotation on a pinpoint.
- The Catch Phase – Dig your blade into the water by your feet, fully immersing it in the water.
- The Power Phase – Using a wide arc that extends way out from the kayak at its apex, use wide sweep strokes to pull the boat around. Focus on the hand and body techniques from earlier.
- The Release Phase – Pull the paddle from the water as it reaches the end of its sweep stroke.
The Draw Stroke
The draw stroke pushes your kayak sideways, great for pulling up to a dock.
- Push your paddle blades into the water at a horizontal angle a few feet from the kayak.
- Use your lower hand to pull the paddle towards you being careful not to lean too far out.
A Few Safety Tips
Kayaking should be fun first and foremost, but safety is a close second. Staying safe is always quite simple.
- Don’t go alone or let people know when to expect your return.
- Always wear a buoyancy jacket and have a signaling whistle.
- Be careful of weather conditions.
- Check your kit.
- You can opt for kayak outriggers if it’s your first time out on the water.
How Do You Kayak During Sudden Weather Changes?
Always check the weather forecast before you go out. Weather forecasts can be wrong, though and if you get caught in rainy or windy conditions, stay calm, get out of the water and find shelter from the high winds and rain.
Beginner Kayaking Tips for Your next Kayaking Trip
- Go out in warm weather and dress appropriately.
- Don’t expect to be a pro right away. Take your time, and it’ll come.
- Try out different types of kayaks, waterways, and gear. There is so much variety. Initially, get yourself a budget-friendly option like a fishing kayak under 500 or a fishing kayak under 1000.
- Learn how to store your kayak properly at the end of the day.
- Have fun!
Before I Eskimo Roll My Way Out
Remember, the beauty of the lakes, rivers, and oceans you kayak on depends on the environment around it. Take care of it, and it will take care of you. Always recycle your trash, and don’t fill our waterways with rubbish.
0 Comments