I mean, who doesn’t even like exploring new horizons? Untouched powder and deep wilderness? Don’t we all love backcountry skiing? For sure, we do!
Most beginners with a little experience of just knowing how to set up skis want to go backcountry. That is precisely why they come back with zero tolerance for leg jokes.
Now that you are scarred for life, let me explain this style of skiing. Backcountry skiing is all about majestic tree runs and hiking out-of-bounds slopes somewhere deep in the wilderness. Whenever you trespass the controlled boundaries of a resort, that is exactly when you are backcountry skiing.
But before you hit off-piste, you must conduct thorough research on this style. Don’t over-push yourself, man.
Being your guiding angel, I want you to understand what it takes to nail backcountry runs. What are the prerequisites for trespassing because you can get lost easily, what gear is worth it, how to plan your first ski tour & which country is best for skiing?
Although these tips wouldn’t suffice, they guarantee many fun rides. Read on to find out what you need to do to save your arse.
How to Start Backcountry Skiing with No Skiing Background
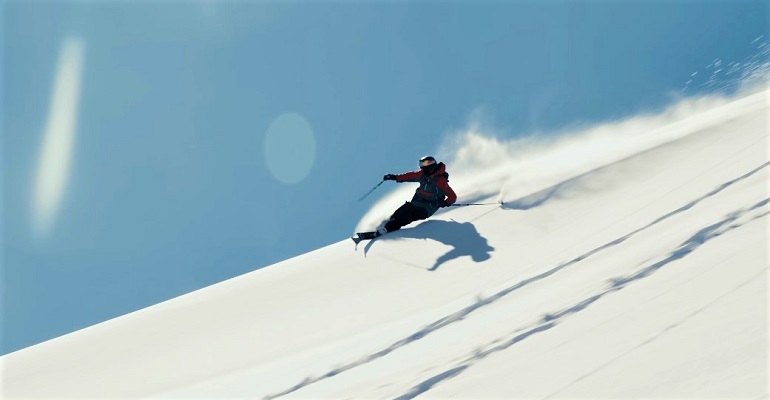
What is more enchanting than not having to wait in lift lines for runs? Nothing. The attraction of carving turns on untracked snow is gigantic.
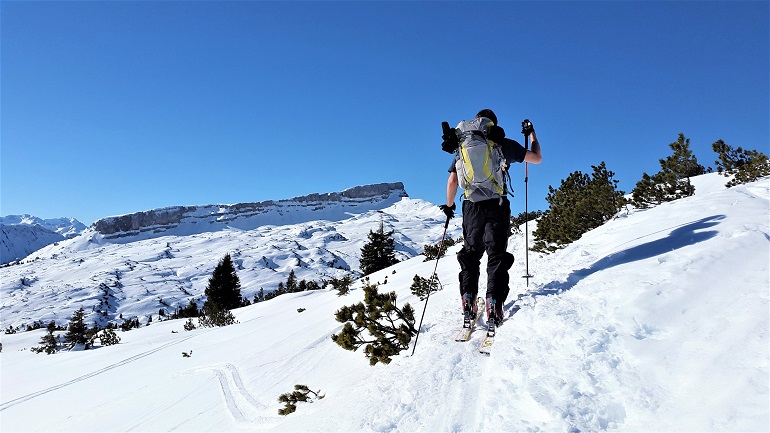
Backcountry skiing is done in unpatrolled areas of a ski resort. With the help of lightweight alpine touring or telemark gear mostly, riders walk uphill to explore the terrain outside of the maintained area of a resort, then ski their way downhill. You may know what is ski touring.
It is quite different from skiing inside a resort; you won’t find any ski patrol for safety there, so you are required to rely on your own skills, knowledge, and team.
I mean, you are heading towards the unknown land, so you better buckle up and set your expectations as high as tall wolves. Better forget about the perks of maintained and controlled boundaries already!
Now that you have gotten familiar with what backcountry really is, let’s get into the details and see if you are ready to become a dragon or a dragon without fire.
First thing first, you need to be an advanced experienced rider for backcountry skiing. Okay! I know you are here because you don’t have any experience. I said that just to make you realize how serious it is for a skier to learn things before hitting backcountry.
Let’s get back to the point. You need the right type of gear along with proper training to fight yeti attacks and avalanches. Identifying a steep terrain, an avalanche terrain, and navigating a map should be a piece of cake for you, not a bite of pastry.
Moreover, taking an AIARE level 1 class to minimize the danger of avalanches is also mandatory. These three days of class will not render you a master; however, it proves to be a good start in contrast to your zero experience.
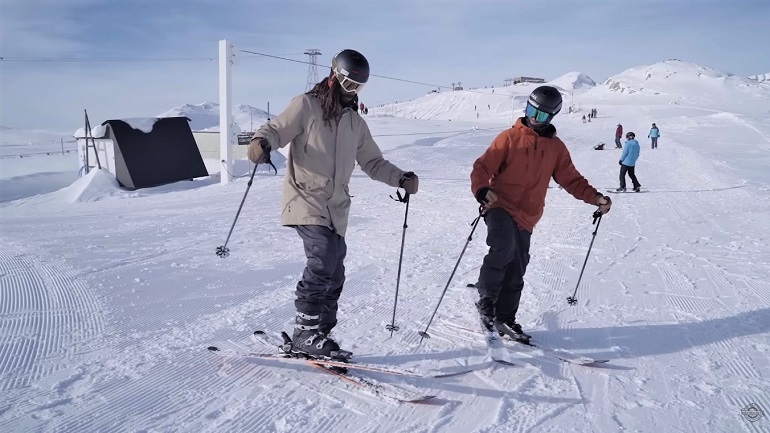
On your first time going backcountry skiing, the best way would be to find a resort that offers nice terrain close to a lift system. This way, you can study the terrain before hitting it while hiking from the lift. While doing so, take help from an experienced ski friend or a guide.
Navigating the terrain stands important as you will be alone all on your own once you step into the unpatrolled area. I suggest you go over the topics below one by one and try to accumulate knowledge and insight as much as possible.
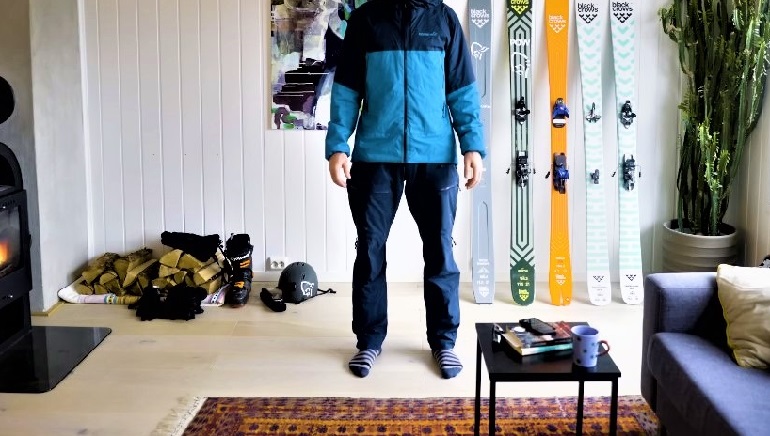
Befriend Your Ski Gear
The proper clothing and the right gear would prove your life savior during ski touring. What do I mean by that? Clothing that complements the weather! I mean, clothes that felt fine for riding lifts might feel too hot while making your way uphill and less warm when you reach the summit.
Similarly, broken bindings might not create a hassle inside the patrol resort area, but they indeed will suck halfway up an icy track. Don’t you think? It would be far better to get to know your gear before you put it in charge of your success in the unmaintained area.
It would be wise to check the fitness level of your gear, even if it is new.
Secondly, practice as much as possible before you take your gear out on the terrain. For example, learning how your backcountry ski boots and bindings work, how you can easily remove or attach, etc. Also, always learn what to bring on a ski trip so you won’t miss the necessary accessories for your journey.
If you haven’t packed a bag with safety equipment like an avalanche beacon (transceiver), a shovel, an avalanche probe, or a granola bar, get out. Because I am not sharing mine!
Avy Education
What is important is to know where to go, and what stands even more critical than that is to know where not to go. That is exactly why avalanche classes become essential before heading out.
Before you enroll yourself in a formal avalanche field course, I suggest you also attend an awareness course which is usually an hour-long program set in gear shops.
In this particular course, you chit-chat a lot about the possible issues you can face on the terrains and avalanche safety as questions and get your questions answered by experienced people.
On the other hand, the Level 1 Avy course spreads to 24 hours, with half of its time spent in the field. The course offers guidance on safety basics, some insights on how to read and understand avalanche bulletins, and how to identify avalanche terrain. It teaches you how to use and implement bulletin information in real life.
Besides the avalanche and awareness course, you should also attend an 8-hour course focused on avalanche rescue measures in case you get stuck or face avalanche terrain. It helps you learn how to use a probe, a shovel, and an avalanche transceiver.
Some U.S. Avalanche Centers even offer free classes and seminars. Compared to Europe, Canada, New Zealand, and the USA offer a more conventional approach to awareness regarding such accidents.
Taking a free REI avalanche course would prove very beneficial for you and your companions regarding managing risks. Then you can switch to formal avalanche training that includes fieldwork too.
Level 1 and Level 2 courses endorsed by National Avalanche Association give insights on the basics of rescuing a group member, finding a buried victim, and using your equipment properly.
Get in Shape
What makes an ideal candidate for backcountry skiing? The answer is someone who can ski for straight 3 hours and rests somewhere between an intermediate to advanced rider. Stamina is the key here!
I mean, what did you expect from skiing variable snow? An airwalk? Nah! Did you forget you need to climb uphill first, then ski? Did you forget your heavy backpack? Did you not imagine yourself carrying heavy weight while staying on your feet for hours? Poor soul.
A good start would be to test your fitness level first, as hiking uphill and skiing back down proves quite challenging for many. Practicing blue square at the resort, being reasonably fit, and assessing your fitness sounds like a good idea rather than some snow accident.
If you judge you lack any important skills, consider taking lessons first. Not to mention, be brutally honest while assuming your fitness level.
You know, a ski resort is abound with properly planned groomed trails, which is not the case in the backcountry as it happens to be a wild place. Snow conditions can also change from a perfect powder stash day to a messy, wet, and heavy day.
As you have zero directions regarding slopes, you need to judge for yourself the right path through the wilderness. Believe me, those cliffs, chutes, trees, and rocks can get the best of you. So better be cautious while choosing your runway!
Right Clothing
Right clothing means the right amount of layers to combat cold weather. Firstly, you need to familiarize yourself with the layering system.
Let me tell you something; moisture is your enemy. Be it sweat, snow, or whatever; moisture is going to take your breath away. One more thing, keep in mind that these layers make all the difference. You decide whether to shiver with the cold or swim in your sweat. None, you desire balance.
It gets mandatory for you to wear an outer shell to keep yourself unharmed from the snow and wind, a middle layer to trap air for better insulation, and a best base layer to wick sweat away. In addition to that, make sure your clothing boasts good ventilation through extra zippers. I mean, don’t you want to enjoy all the seasons ahead?
A comfort zone will provide the extra confidence and control that you may lack because you have zero skills. Just leave if you don’t fit the profile I have described in the section above, alright? Just don’t get on my nerves! Learn some skills!
Book a Guide
If you happen to bury yourself under tons of snow, who do you think is going to get you out of there? Yes! Exactly! A bear. Or a wolf, maybe?
Believe me when I say they are always out there roaming with trolleys to buy breakfast and lunches. Even if you’re sure 100 percent in negotiating with these creatures, you fail.
Now, let’s go 180 and see what happens. If you get injured or lost in the unpatrolled area, a guide is ready to help you, as you cannot find a snow patrol in the backcountry.
By bringing along a guide, you are minimizing your risks of being the next meal of the wildlife. So, he helps you out and shakes hands with the bear, which offers a helping hand, and runs away.
On a serious note, if you have decided to find a guide, look for a competent one from the American Mountain Guide Association (AMAGA). This association holds up well in its specific standards for guides. You can also consider Vetta Mountain Guides, Synnott Mountain Guides, or Northeast Mountaineering.
Typically, they charge anywhere between $300 to $450. The cost can vary according to your location and whether it is a group or private tour. Play safe, buddy!
The Right Touring Partner
Guess what? Traveling with a partner helps in minimizing risks. A shovel, a probe, a beacon, a partner, and a plan are one solid plan for a successful backcountry day!
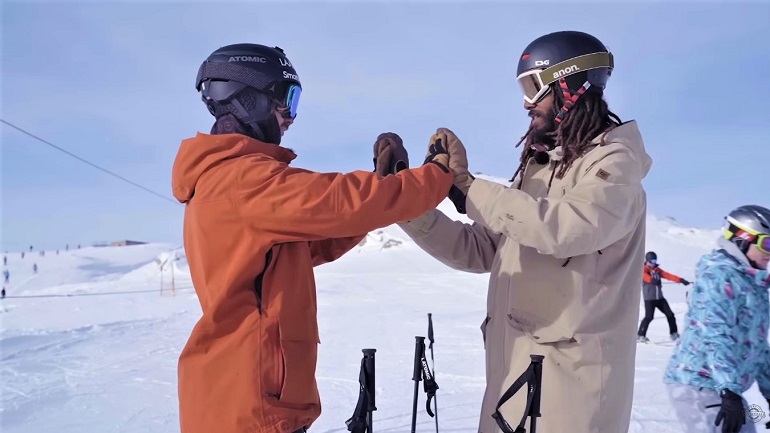
The right partner holds the same amount of energy as you. Someone with a similar fitness to yours, tolerance if things go south, and more experience than you makes a perfect partner in the backcountry. Backcountry is a whole new world!
Let me help you a bit in picking the right one. Always reconsider someone who boasts a lot about giving death to avalanches and whatnot. Just run away, Okay?
The Merits of Backcountry Skiing
Backcountry skiing gives you a chance to experience serene landscapes that are challenging both physically and mentally. What a good sport, isn’t it? Well, I can bring into light more perks if you want:
- First of all, carrying gear is a proper workout for shoulders and arms. If you are not that physically active in the winter and hate to exercise, I suggest you exercise now before heading out. Wearing yourself out after just an hour is the worst nightmare of backcountry skiing.
- Modern gear, i.e., skiing boots, bindings, skis, and poles, are surprisingly light. It saves you a lot of energy.
- In the backcountry, skiing proves more fun than snowshoeing or post-holing.
- Who else fears snow bridges and glaciers? Guess we all do. Well, skis mitigate the risk of breaking through them.
- Backcountry skiing is much more fun when doing traverses across the snow.
- If you are after speed, go downhill for a fast and furious run.
- It is better to drop snowshoeing in areas with more snow coverage because skiing is faster.
- For activities like ice climbing, skis are required.
- Backcountry skiing adds a whole new perspective to mountaineering.
Why Learning to Ski Is Different than Learning Other Mountain Skills
Learning to ski a mountain is very different from learning to climb a mountain or other mountain-related skills like rock climbing etc. I mean, while making your way uphill, you are working against gravity.
On the contrary, skiing downhill, you are working with gravity. While going down, it gets much harder to control your motions as you always feel like going down.
Downhill skiing is also known as alpine skiing. It is usually done using patrolled lifts at ski resorts. But, in the backcountry, downhill is done on an unpatrolled area that is wilderness in toto. So, equip yourself accordingly with the required skills and equipment.
Remember, skiing a difficult run in better conditions proves to be much easier than skiing an easy-peasy run in bad conditions. Conditions matter a lot in the backcountry.
One more thing, grade chasing might cause you trouble instead of leveling up your skills. I would say, in skiing backcountry, it is not a good idea to improve; instead, you should cut yourself some slack here. One thing that you should not give up on is the basics. Ace the fundamentals before you challenge yourself.
Let’s Talk about Gear

You will find a diverse range of ski touring gear meant for backcountry skiing. So, it often gets complicated in deciding gear for yourself. From ultralight equipment for racing to big gear for surfing snow, how do you figure out what is perfect for you?
If you want to climb a lot like a monkey, you should go for lighter gear. However, if you like to surf powder, add that extra weight for quality performance. Heavyweight is ideal for faster speeds and excellent performance.
On the other hand, lightweight gear lets you cover more ground in a day. However, it doesn’t degrade your downhill performance either. I think going for lighter skis and avalanche gear will prove more beneficial.
Some people opt for alpine touring gear when just getting started. I suggest you buy a downhill setup that is cheaper, more convenient to learn on, and acts as a catalyst instead of keeping you a tour gear rider for your first year.
To conclude, it is better to go for lighter backcountry gear for skiing and ski mountaineering. Now let’s talk about each piece individually.
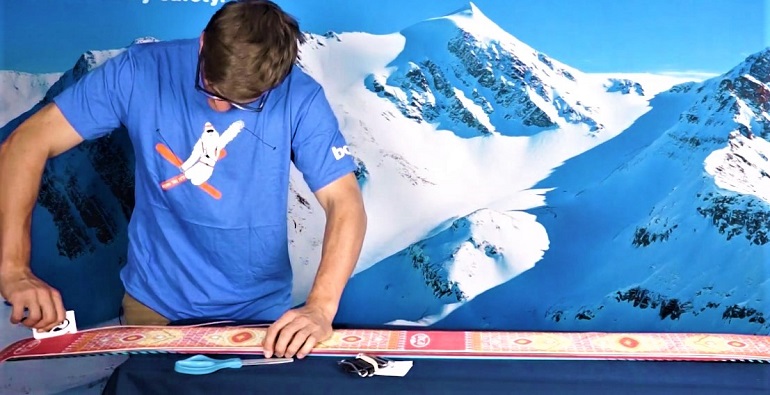
Backcountry Skis
There are no backcountry-specific skis to utilize; hence people tend to use downhill skis, touring skis, alpine skis, or all-mountain skis for going ski mountaineering in that unmaintained area.
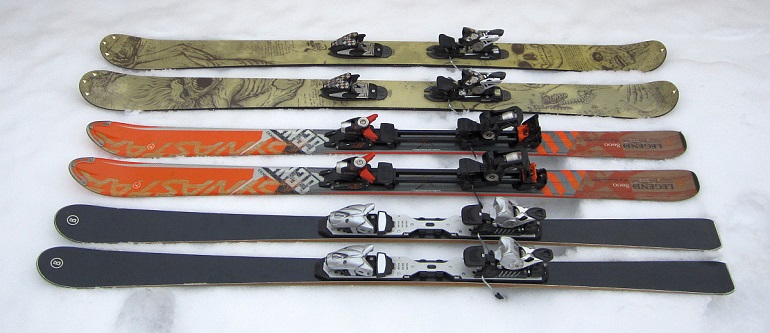
So, let’s start with what stands imperative when it comes to skiing off-piste. The best backcountry ski needs to perform well when you climb uphill and ski downhill. Ultimately, the right touring skis for you are the ones with the best performance for the expected job. Firstly, you must ask yourself what you want to do with them.
The most important thing to consider while buying a pair is to check its weight, which depends on its construction and material. As material construction determines the weight of the backcountry skis, always refer to mentioned weight while buying a set for yourself.
After weight comes the width and length of the skis, you need to avoid heavy and narrow waist-width backcountry skis. Your friend here is something that is lightweight and wide. Why? You don’t want your skis to twitch, right?
So, the wider the waist, the better performance in deep powder. For deep pow days, consider a ski around 118mm. On the contrary, 102-112mm wider skis will do for regular alps.
An appropriate length for backcountry touring skiing would be the same as your best downhill skis. However, a shorter size can work too if you are just a beginner skier. I
t would be much better to switch to short-profile skis, as it makes it easier to kick turns. It is not an issue at all if longer skis are your type. Longer skis assist in a better float on an ideal powder day.
Now let’s talk about camber, rocker, and contact points. I would say, for newbies, it is better to start with cambered center profiles and an early rise in the tips. Camber/Rocker is the curvature you notice if you lay your skis flat on the ground.
Traditional camber advocates two contact points with the ground, made by both tail and the tip. Such a profile provides for better control and stability.
Rocker refers to how much the skis turn up at both ends. It stands responsible for more float and power. How much rocker/camber you need depends on what you want to do while in the backcountry.
Backcountry Ski Bindings
The mandatory feature your backcountry ski bindings should swank is the ability to make your heels move up and down so you can tour up. Mainly there are three types of alpine bindings:
- Frame bindings
- Tech bindings
- Hybrid bindings
Let me briefly explain each individually. Frame bindings are the conventional style mounted to a frame. The frame then is bolted to the skis that release at heels for climbing skins. Frame skis are not ideal for uphill travel as they are heavier and bulky.
Tech bindings are the life savior for most backcountry skiers as they are lightweight and transition easily from walk to ski mode. Hybrid skis, on the other hand, combine the qualities of both tech and frame bindings.
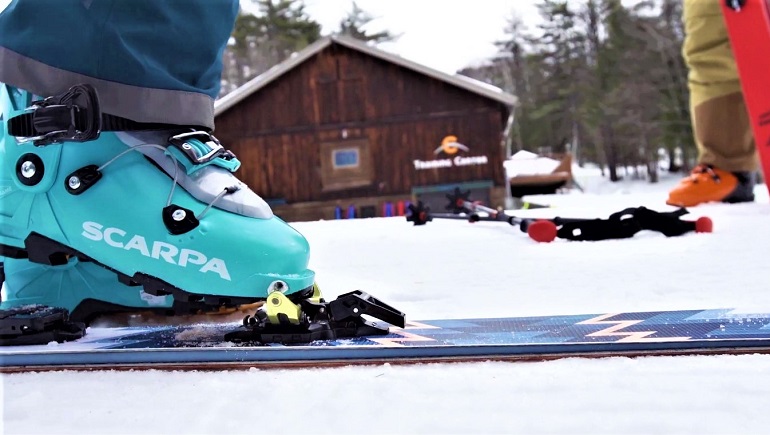
Backcountry Ski Boots
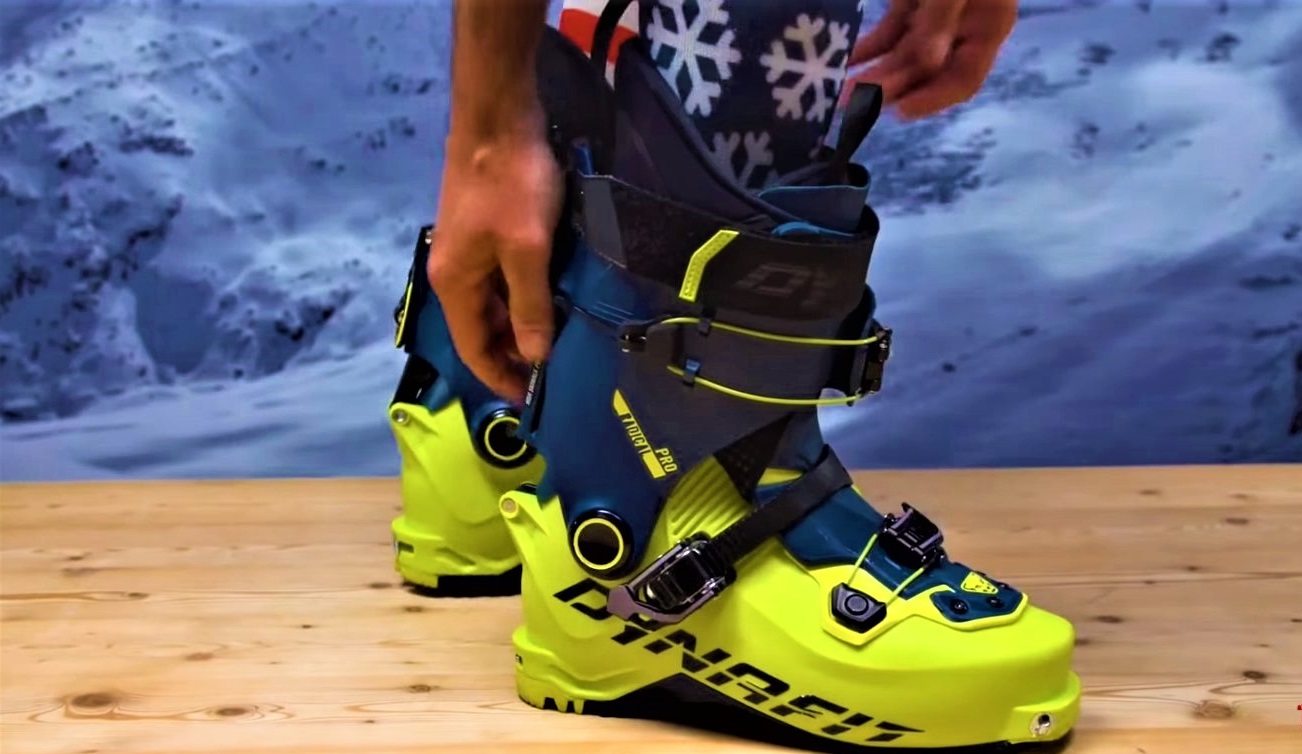
Good ski boots allow quick walking and ski mode transition, are lightweight, and allow their cuffs to move forward for comfort while skinning. However, if you are one heavy-weight aggressive backcountry skier, I suggest you go for heavier touring boots – 1500g or more.
An ideal pair allows easy flex and enough movement while staying stiff—also, optimal warmth and comfort.
Since most backcountry boots are lightweight, try to invest in field-serviceable hardware and a repair kit also. Before venturing out in the wild, take some time to master field repair to save yourself from any boot failure.
Lastly, make your touring bindings and boots complement each other. You know, some touring boots sit compatible with tech bindings only, while others rest okay with frame bindings only. Do your homework properly before saying yes.
Climbing Skins
Skinning is all about attaching a rug-like piece to your skis for better traction to climb uphill. Skins make a primary tool of a backcountry ski setup.
You fix these thin strips underneath your skis to enable walking mode. It plays a vital role in keeping you from sliding backward while progressing upward on a mountain.
Available in numerous core materials, skins level up your ski performance when skiing uphill! The most famous skins are nylon skins, mohair, and seal skins, or a blend of nylon and mohair. The underside of the skin is made sticky for adhesion purposes.
You are expected to adhere skins to the bottom of your skis, walk uphill, and peel them off when you have reached your desired spot. Upon reaching the top, stick together the glue side of both the ends of the skins and fold them in half, wrap them inside any warm material and keep the glue from getting hard.
Ski Poles
Do you want to know a tool that works like magic in the backcountry ski area? Yikes! Not a regular pole but an adjustable ski pole.
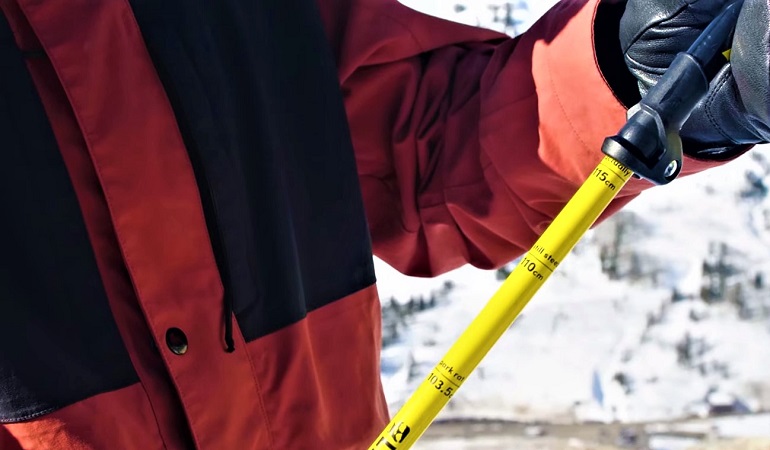
Opt for a collapsible pole if you want to nail your runs. Believe me; it will save you a lot of time and effort. I mean, what could be more convenient than being able to use both long and short-length ski poles as per your need?
With adjustable poles, you can use long lengths while shredding down the hill and switch to short lengths when you are skinning uphill. Also, it comes in handy to pack it up in your backpack when you are done using it.
Backpack
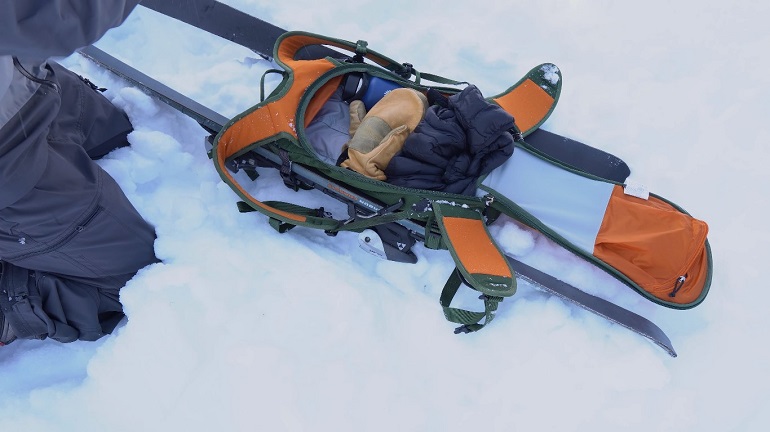
You better equip yourself with a backcountry ski backpack stuffed with your avalanche safety gear: beacon, shovel, and probe, only if you want to return safe and sound. Also, add some snacks and water to keep your energy at an optimal level.
Although any kind of bag can do the work, it is better to opt for backcountry-specific backpacks. These skiing-specific bags are durable, abrasion–resistant, and water-resistant. These bags also feature designed compartments to hold in place your accessories like shovels and probes.
Plan Your First Backcountry Tour
Did you just start backcountry skiing, and want to minimize the risks as much as possible? But how do you do it? Out of the many I have already discussed, the below-mentioned two most important precautionary measures can prove to be a good start:
Prepare Your Clan
A new backcountry skier should always consider going with a guide or a whole group, especially if it is the first time. Reaching out to any trustable online platform to approach experienced skiers sounds like a good idea.
Tap into any of the backcountry skiers, see if they are up for backcountry travel in the same season, and bingo! Rely on WOM (word of mouth), guidebooks, and websites when choosing a guide or a group.
I mean, it is a lot better to learn from someone else’s mistakes, isn’t it? Lol. But no, Jack, you cannot always rely on the decision of others. What seems like a piece of cake to them might prove an ice zombie for you. So, always speak up if you find anything suspicious.
Avy Bulletin
Make it a habit to always check the avalanche forecast before hitting fresh snow and plan accordingly, only if you desire to become a successful backcountry skier. I repeat an avalanche safety course is a must.
It saves you a lot of time and effort, and most importantly, it saves your life. You can visit avalanche.org for the latest Avy reports to minimize risks of avalanche danger.
Wrapping Up
Like any other sport, there are also some inherent risks with backcountry skiing to look out for. Some gigantic hazards are avalanches, crevasse falls, and buried objects.
Preparing yourself for a backcountry tour is like preparing a whole new subject for a difficult exam. You know, you are your own master in the backcountry terrains.
That is why, on your first trip, try to go with a guide or experienced touring partners to reduce the risks of failure, as well as equip yourself with sufficient avalanche education.
Your utmost concern should be your safety when you go backcountry skiing. Especially on your first tour, try to avoid avalanche terrain and go through the Avy bulletin before heading out.
Happy backcountry ski season!
0 Comments